Arch Install with Encrypted Disk and Systemd Boot
Preparation
Download the arch iso and put it on a USB using:
dd if=ARCHISO of=/dev/USBDEVICE status=progressBoot into the USB by holding the key combination for the boot menu (specific to your device) and select the USB from the list.
For hidpi devices it might be useful to set the font to the largest available size:
setfont solar24x32This guide is for UEFI systems - check that the /sys/firmware/efi directory is not empty:
ls /sys/firmware/efiConnect to network - plug in ethernet or use wifi:
iwctl --passphrase PASSPHRASE station DEVICE connect SSIDWhere DEVICE is the wireless device, usually wlan0 (check with ip a)
Check network:
ping 1.1.1.1 # check internet

ping google.com # check DNS
Set system time with
timedatectl set-ntp truePartitioning and Setting up Disks
List the disks to find the name of the device you want to install arch on:
fdisk -l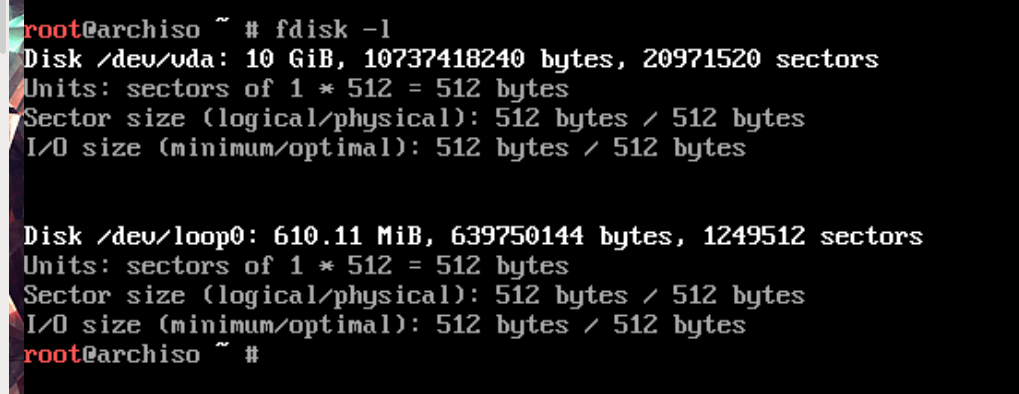
The device is likely to be something like /dev/sda or /dev/nvme0n1. For the examples I will use /dev/vda but replace this with the disk you are using.
If you have previously had sensitive data on the disk, overwrite it using:
shred -v /dev/vdaPartition the disk using cfdisk:
cfdisk /dev/vda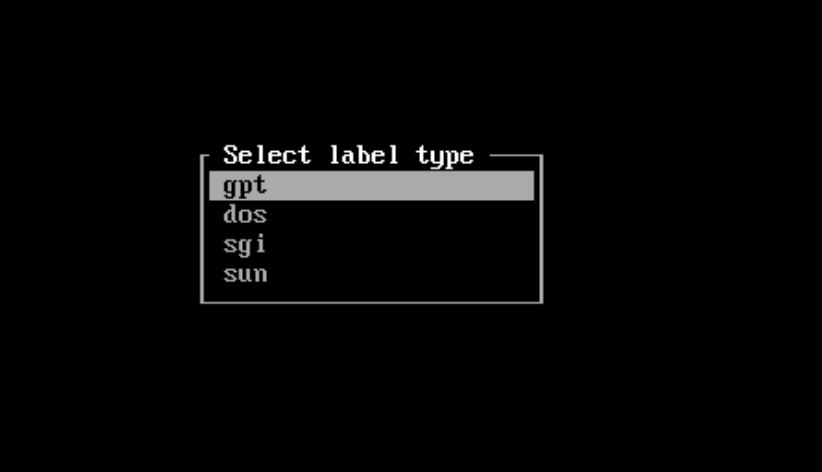 Choose gpt as the partition scheme
Here you want to delete any partitions that may already exist and create two partitions for the install:
1 - partition with size of 512MB and type "EFI System" - this will be the boot partition - which the device firmware will use to load the operating system.
2 - partition with the remaining size of the disk, with type "Linux LVM" - this will be the partition which we encrypt and store the filesystem on.
The partition setup in cfdisk should look like the following:
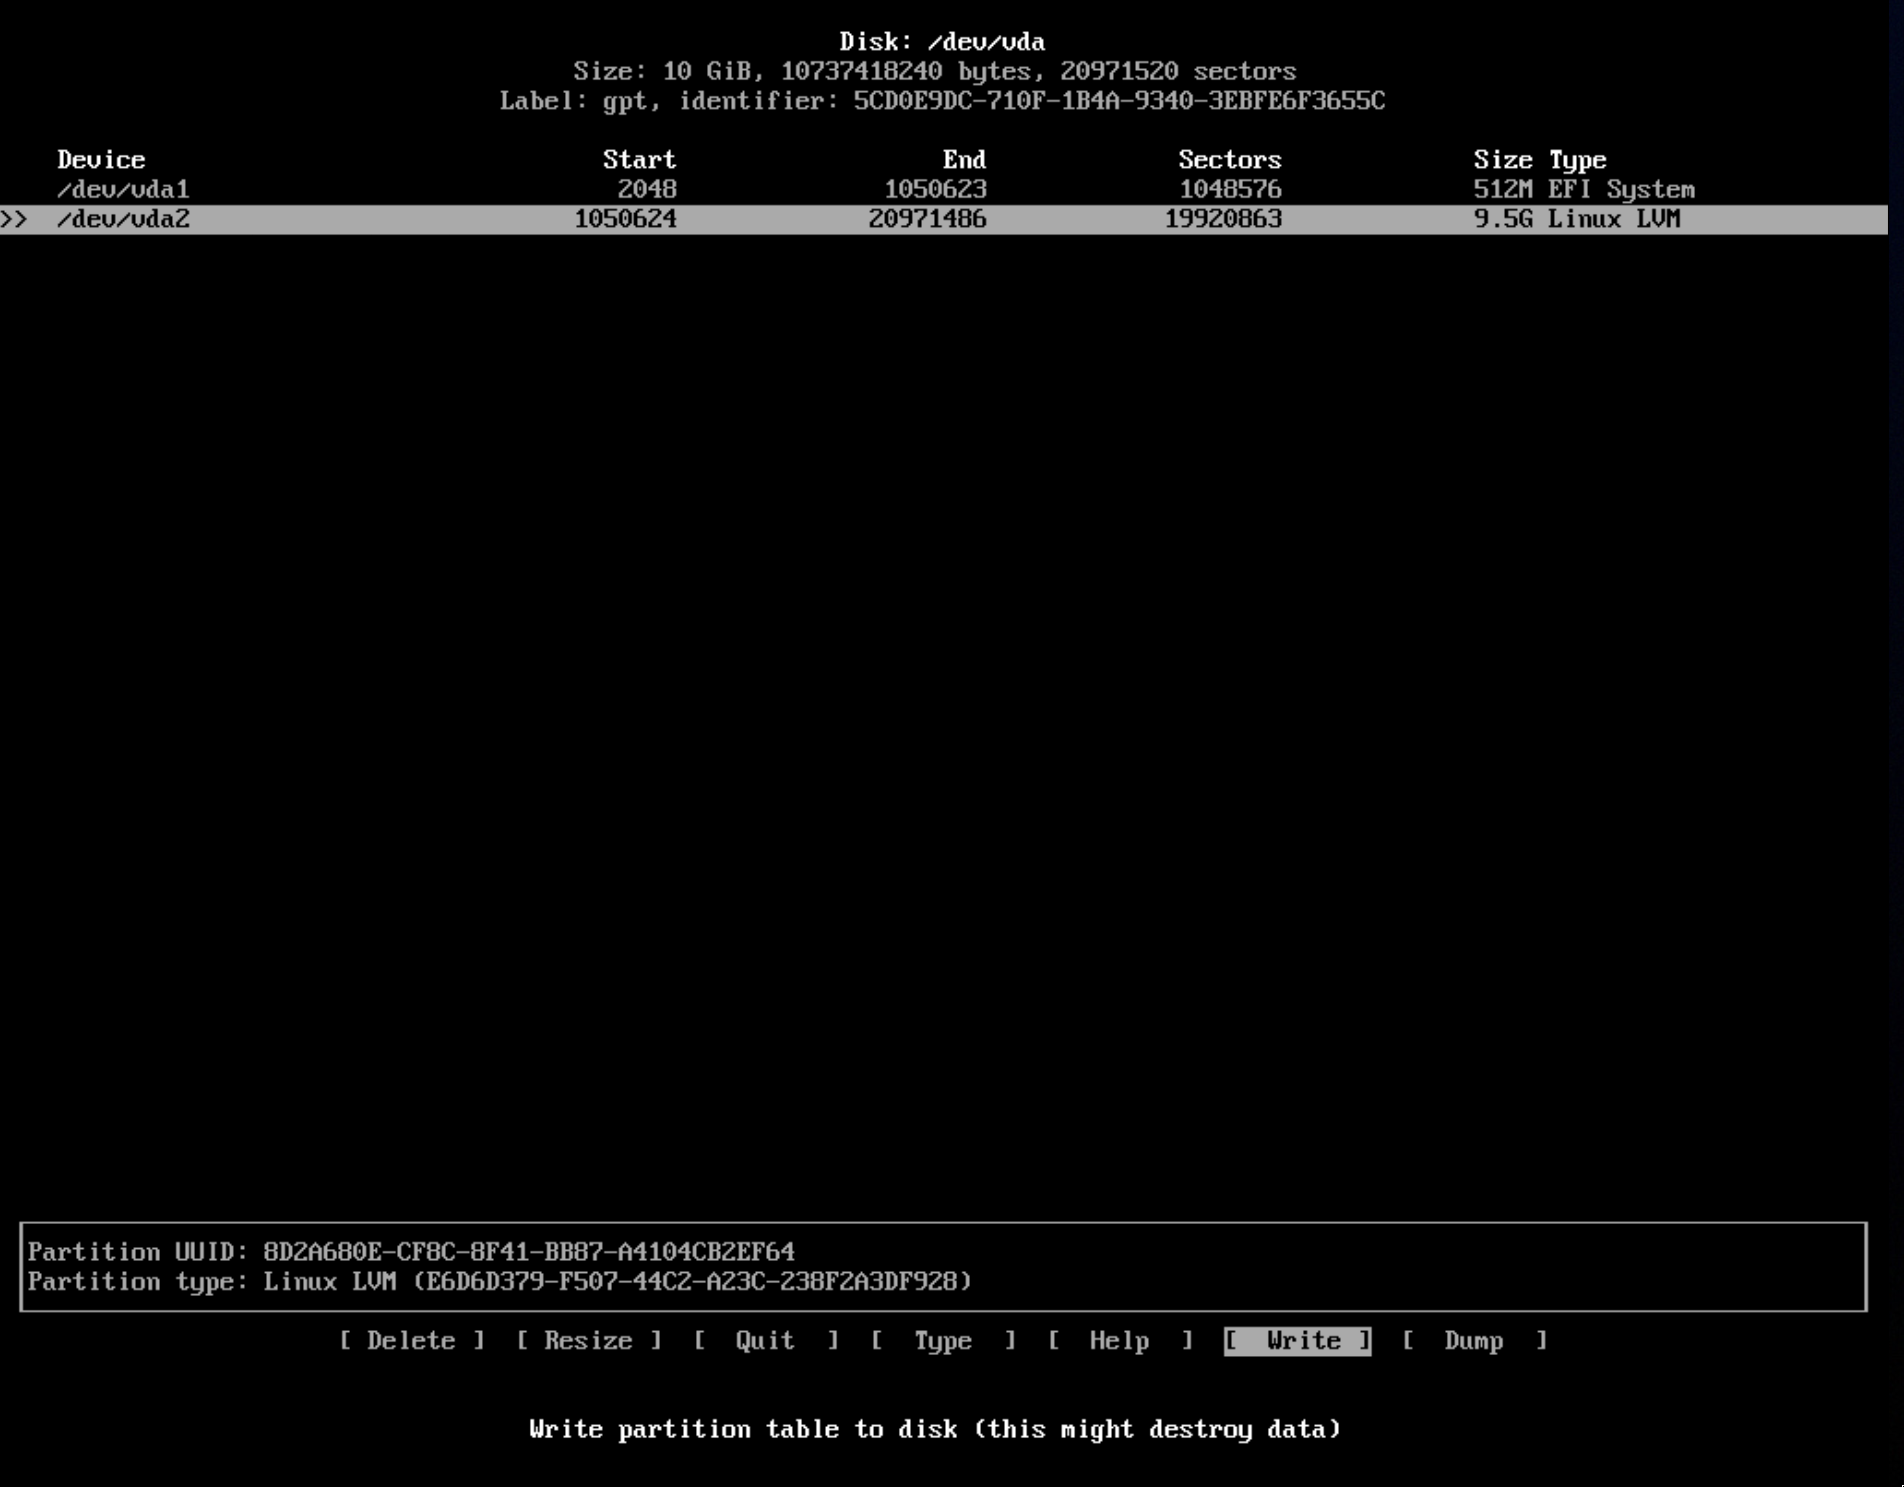
When this is done press write, type yes and hit enter, then press quit.
Format the filesystem for the EFI partition:
mkfs.fat -F32 /dev/vda1Encryption
Check dm-crypt kernel module is loaded:
modprobe dm-cryptEncrypt the disk (you will be prompted to enter an encryption password):
cryptsetup luksFormat /dev/vda2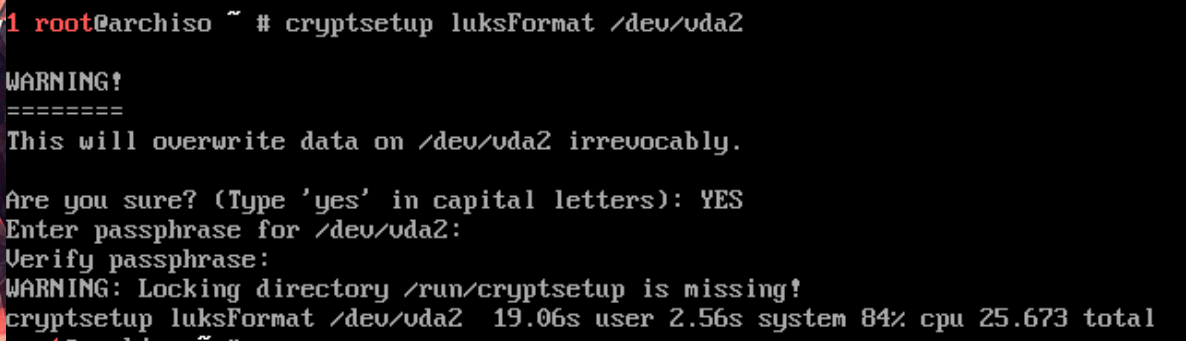
The disk is now encrypted and is not in a readable format - we need to 'open' it in a way that the operating system can access it. To do this we run a command that creates a device mapper which acts as a physical disk, but actually is decrypting / encrypting data stored on the physical disk. Here we will use 'cryptroot' as the mapper name - which means that we can access the decrypted disk data at /dev/mapper/cryptroot.
cryptsetup open --type luks /dev/vda2 cryptrootCheck the mapper has been created (look for /dev/mapper/cryptroot):
ls /dev/mapperAdd mapper disk as a 'physical' disk for lvm - this means lvm can use this disk as part of an lvm volume.
pvcreate /dev/mapper/cryprootCheck physical lvm disks with pvdisplay
Ceate volume group - this creates a group of disks (using disks available shown in the output of pvdisplay) - in this case our group will only contain one disk - the one we just added. The name of the volume group in the following command is just 'volume' but if you are creating multiple volume groups it can help to give them meaningful names.
vgcreate volume /dev/mapper/cryptrootYou can now list the volume groups using vgdisplay - and you should see the volume group you have just created.
You can now create logical partitions from the volume group - in this case we will make a 2GB swap volume and use the remaining space for a root partition. You can additionally other separate partitions such as a home partition or a var partition.
lvcreate -L2G volume -n swap # create a volume in from the volume group 'volume' with a size of 2GB and name 'swap'

lvcreate -l 100%FREE volume -n root # create a volume from the volume group 'volume' using the remaining space in the volume group, with a name 'root'
To check you have created these properly you can use lvdisplay
These volumes are now accessible and can act like physical disks - they are available from /dev/mapper/{volume-group-name}-{volume-name}
We can now format them as following:
mkfs.ext4 /dev/mapper/volume-root


mkswap /dev/mapper/volume-swap
Mount volumes / filesystems
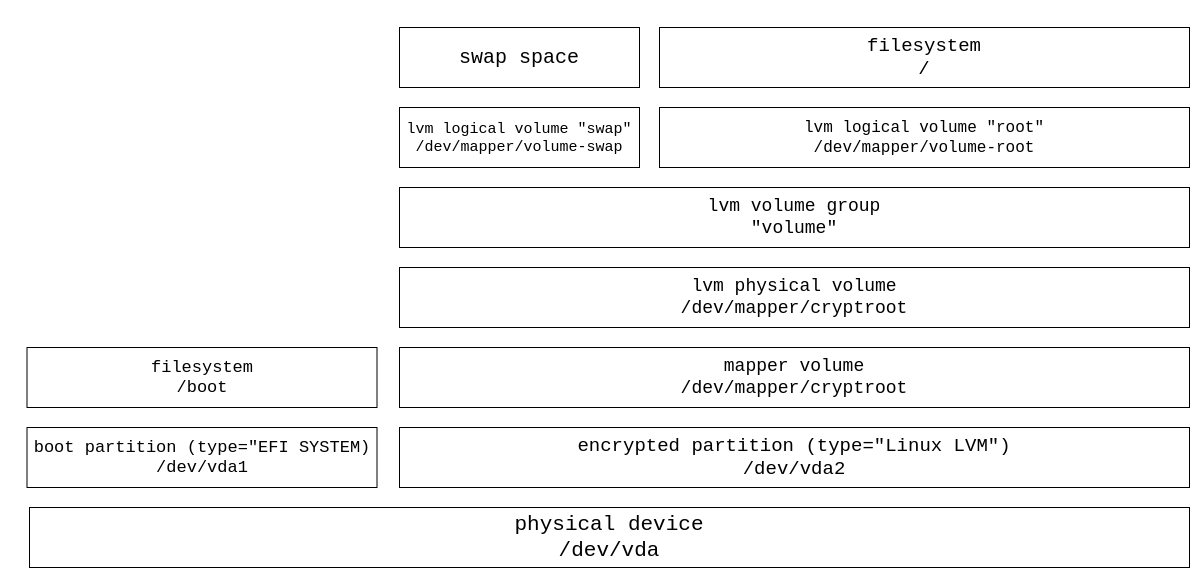
This diagram shows the abstractions between our filesystem and the physical disk we are using.
Mount the volumes, using /mnt as the root of our filesystem - this means that what we put in /mnt during the install will end up at / in our final system.
First we mount the root volume to /mnt:
mount /dev/mapper/volume-root /mntWe also need to mount the boot partition so we can install a bootloader:
mkdir /mnt/boot

mount /dev/vda1 /mnt/boot
We can also enable swap memory:
swapon /dev/mapper/volume-swapInstallation
We can now use pacstrap to install arch. Pacstrap acts similar to arch’s package manager - pacman - but it allows us to specify a filesystem root. This means that instead of us installing extra packages on the USB’s operating system that we are using for the install, we can place packages onto another disk. In this case we will give /mnt as the filesystem root - this means that when the installation is finished and we use this as our root partition everything will be in the right place.
The syntax for pacstrap is
pacstrap DESTINATION PACKAGE1 PACKAGE2 ...First we will install the base filesystem. The arch 'base' package installs necessary programs and filesystem components such as bash, network tools, pacman etc. The 'base-devel' package is optional but is useful if you are likely to be compiling programs from source as it installs programs including gcc and make. We also need the 'lvm2' package as this is needed for the operating system to open the logical volumes we have set up.
pacstrap /mnt base base-devel lvm2Next we will install the kernel and kernel firmware (the firmware package is needed to allow the hardware to work with the operating system). In this case I have used the linux-hardened kernel, but you can use other kernels.
pacstrap /mnt linux-hardened linux-firmwareNext you can install any packages you want available immediately after install - one of the most important in this case is iwd - if you only have internet available through wifi you will want to install iwd or another wifi package now, as when you reboot into the operating system you will not be able to install it or any other software. I have also chosen to install neovim, zsh and git but these are optional.
pacstrap /mnt neovim iwd zsh gitLinux uses a filesystem table stored in /etc/fstab to know which disk devices to mount where. We can use genfstab to generate the table with the currently mounted devices (this includes the boot partition, the root partition and the swap).
genfstab -p /mnt >> /mnt/etc/fstabFinal bit of setup
To finish setting up the arch operating system we need to chroot into our installation - this changes the apparent root of the filesystem - we will chroot into /mnt as this is where the root of our filesystem is mounted.
arch-chroot /mntSet local time (to find the name of your time zone look in /usr/share/zoneinfo and its subdirectories for the zone appropriate for your location - for example if you’re in New York the zone would be /usr/share/zoneinfo/America/New_York).
ln -sf /usr/share/zoneinfo/XXX/XXX /etc/localtimeSync the hardware clock with the system (software) clock
hwclock --systohcSetup locale - this allows programs to appropriately show region specific text such as currency, date and time formats etc.
Uncomment appropriate line(s) in /etc/locale.gen - for example "en_GB.UTF-8 UTF-8" and then run locale-gen.
Create locale config file:
locale > /etc/locale.confSet system hostname:
echo "MYCOMPUTER" > /etc/hostnameCreate hosts file - put the following content in /etc/hosts replacing MYCOMPUTER with the hostname you have chosen:
127.0.1.1 MYCOMPUTER.localdomain MYCOMPUTERInstall bootloader
During the boot process, an initial ram filesystem is needed to mount the root filesystem. Our disk is encrypted and uses lvm for logical volumes - but to mount the raw filesystem we need the dm-crypt and lvm2 kernel modules, which are stored on the disk. Therefore we need these to be present in the initramfs image which is placed in the boot partition - which is not encrypted and doesn’t use lvm.
To make sure these modules are in the initramfs we need to change the line beginning with 'HOOKS=' in the file '/etc/mkinitcpio.conf' and add 'encrypt' and 'lvm2' after 'keyboard'. It should look similar to the following:
HOOKS="base udev autodetect modconf block keyboard encrypt lvm2 filesystems fsck"Then to generate the new initramfs image we can run
mkinitcpio -p linux-hardenedNow we can install the boot loader using:
bootctl --path=/boot/ installThen we modify the bootloader main config to contain:
/boot/loader/loader.conf
default arch
timeout 3
editor 0
and the config for the arch boot entry:
/boot/loader/entries/arch.conf
title Arch Linux
linux /vmlinuz-linux-hardened
initrd /initramfs-linux-hardened.img
options cryptdevice=UUID=YOUR_DISK_UUID:volume root=/dev/mapper/volume-root quiet rw
To get YOUR_DISK_UUID run blkid /dev/vda2
Finish
You are now done! You can exit and reboot.
exit

umount -R /mnt

reboot